Item Multi-Packs in Sage 50

How do you use item multi-packs in Sage 50? What are item multi-packs in Sage 50 used for?

The Item Multi-Packs window allows you to assign additional units/measures to an inventory item, thereby creating a multi-pack. You can access this window by selecting the U/M button, which is located next to the Stocking U/M field in the Maintain Inventory Items window. In the Item Multi-Packs window, you can do the following:

  • change the Stocking U/M
  • allow items to be purchased or sold in a unit/measure other than the Stocking U/M, or multi-pack
  • assign a U/M, weight, and UPC/SCC code for multi-packs that you purchase
  • assign a U/M, weight, and UPC/SCC code for multi-packs that you sell

You can assign two units/measures in addition to the Stocking U/M to an inventory item: one for purchases and one for sales. When you purchase or sell items in units/measures that you have set up in Maintain Units/Measures, the subsequent item, when purchased or sold, is referred to as a multi-pack. Multi-Packs in Sage 50 are simply any inventory item that has been assigned a unit/measure other than the Stocking U/M. The resulting item, usually a box or a pack, contains more than one stocking unit of the inventory item.

Because you can only assign two units/measures to an inventory item, you should select the unit/measure in which you usually purchase or sell the item. For example if you buy in bulk but sell in single units, select the bulk unit in this window. After you have assigned purchasing and sales units/measures to an inventory item, you will be able to select the U/M for line items on the following windows: Quotes, Sales Orders, Sales/Invoicing, Receipts, Credit Memos, Select For Purchase Orders, Purchase Orders, Purchase/Receive Inventory, and Payments.


If you would like to learn more about Item Multi-Packs in Sage 50 and Sage 50cloud, Accounting Business Solutions by JCS offers a Sage 50 Manufacturing/Sage 50cloud Manufacturing training class. For Sage 50 support and training, call us today at 800-475-1047 or email us at solutions@jcscomputer.com.

Close Work Tickets in Sage 50

How do you close work tickets in Sage 50?

What are work tickets in Sage 50 closed for? When a work ticket is closed, an assembly build record is automatically created behind the scenes. Because the assembly build record is automatically created, you won’t have to build the assembly in the Build/Unbuild Assemblies window. To close a work ticket, follow the steps below.

  1. From the Tasks menu, select Work Tickets. The Work Tickets window appears.
  2. Click the Open button and select the number of the ticket that you want to close and click OK. The selected work ticket information appears in the Work Ticket window.
  3. To complete and close this work ticket, Enter or select 2/17/20  in the Ticket Completed box then select the Close Ticket checkbox. This selection will automatically complete and close the work ticket after, the ticket will be given a status of Closed.       
  4. After you have finished, select SaveWhen you save a closed work ticket, an assembly build record is automatically created behind the scenes. 

If you would like to learn more about how to close work tickets in Sage 50 and Sage 50cloud, Accounting Business Solutions by JCS offers a Sage 50 Manufacturing/Sage 50cloud Manufacturing training class. For Sage 50 support and training, call us today at 800-475-1047 or email us at solutions@jcscomputer.com.

Print Work Tickets in Sage 50 and Sage 50cloud

How do you print work tickets in Sage 50? What are work tickets in Sage 50 used for?

Work tickets can be printed and used in various ways. Printed work tickets may be used in your Inventory department to gather the materials needed to build an assembly. Likewise, copies of closed work tickets may be sent along with the necessary materials to authorize the shop to build an assembly.

In Sage 50, you can print work tickets in two ways:

  1. By clicking the Print button in the Work Tickets window
  2. By selecting Work Tickets from the Inventory Report List in the Select a Report window

If you are interested in printing just one work ticket and you already have the Work Tickets window open, print the ticket by selecting the Print button. However, if you are interested in printing a number of work tickets, print the work tickets from the Inventory Report List in the Select a Report window. Use the following procedure to print work tickets in the Select a Report window.

If you would like to learn more about how to print work tickets in Sage 50 and Sage 50cloud, Accounting Business Solutions by JCS offers a Sage 50 Manufacturing/Sage 50cloud Manufacturing training class. For Sage 50 support and training, call us today at 800-475-1047 or email us at solutions@jcscomputer.com.

Sage 50 Bill of Materials for inventory management of Sage 50

Sage 50 Bill of Materials Revisions

Bill of Materials Revisions in Sage 50

Revisions allow you to make changes to the bill of materials for assembly items that have been used in transactions. You can access the Revisions window by selecting the Revisions button, which is located on the Bill of Material tab of the Maintain Inventory Items window. The Revisions window lists all revisions that have been made to the bill of materials and the effective date for the revision. From this window, you can either create a new or edit an existing revision. The original bill of materials is always listed as Revision 0 and cannot be deleted.

Sage 50 Bill of Materials for inventory management of Sage 50

Updates

Bill of Material – Revisions are valuable because they update the bill of materials without altering the original bill of materials. Any item built before the new revision date will be associated with the current assembly build. Revisions allow you to make slight changes to the bill of materials without requiring you to create a new Sage 50 inventory assembly.

Although you can use them in a number of ways, revisions are only intended to be used to make minor changes to the bill of materials. To help clarify what constitutes a minor change and to further explain when to use a revision as opposed to another assembly item, consider the following examples:

Sage 50 Bill of Material – Revision vs New

  • When to create a revision: You produce large quantities of an item and occasionally the options for that item change mid-stream. Let’s say that the screw that you are using for the item is no longer available or you want to use a different screw.  By replacing this component only in the bill of materials, you create a revision. This allows you to produce an assembly item that may differ slightly, but is treated identically for inventory purposes.
  • When to create a new assembly item: You produce large quantities of an item and occasionally the options for the item change mid-stream. Let’s say that one of the components for the item has tripled in price.In this case, we recommend that you create a new assembly item instead of a revision. You should create a new assembly item when costs greatly increase or components change significantly.

Changes to the bill of materials are entered on either the Create a New Revision or on the Edit an Existing Revision window. This is dependant upon whether you selected the New or Edit button in the Revisions window.

Modifications

In this window, you can add and delete items, move items up or down on the component list. In addition, you cab change the quantity required. While you have a great deal of flexibility in what you can change. However, it is important to remember that revisions should only be used to make minor changes to the bill of materials.

When entering a revision, a ‘revision number’ is assigned to the revision and will be listed in the window. For reports that list the bill of materials, the corresponding revision number will also be listed on the report.This will help you keep track of which items should be included in the bill of materials.

Two other very important parts of a revision are the Effective Date and the Note. The effective date is important because it determines when a revision will be used by Sage 50 to build or un-build assemblies. Likewise, a note helps you identify the purpose of a revision. If a note is not entered, Sage 50 will automatically insert a generic note. This note includes the date, time, and the Sage 50 user who entered the revision.

To learn more about Bill-of-Material Revisions in Sage 50 and Sage 100, Accounting Business Solutions by JCS offers training classes. Both a Sage 50 Manufacturing and Sage 50 Inventory Management training classes. For Sage 50 support and training, call us today at 800-475-1047 or visit us www.jcscomputer.com.

Quantity Discounts in Sage 50

How do you use Quantity Discounts in Sage 50? What are Quantity Discounts in Sage 50 used for?

The Maintain Quantity Discounts window allows you to set up discounts for items based upon the quantity sold. You can set up your inventory so that when a customer purchases a specified amount of an item, its sales price is discounted by a percentage or a set amount. For example, you could give customers a 10% discount if they purchase 50 or more of a certain inventory item.

When you set up a quantity discount, you can specify up to five different quantity ranges and corresponding discounts. For example, you could create a quantity discount that gives a 5% discount if 25 or more widgets are purchased, 10% if 50 or more widgets are purchased, 20% if 100 or more widgets are purchased (and so forth), until you’ve created as many quantity discounts as you need. You can create a unique quantity discount ID for each item in your inventory, or create one quantity discount and apply it to whichever inventory items you choose. For example, you could create a discount for a seasonal sale and apply the discount to your seasonal inventory items. You could also create a separate discount specifically for lawn mowers. Quantity discounts are available for stock, master stock, non-stock, service, labor, and assembly item classes.

After you set up the quantity discounts and apply them to inventory items, the sales prices will be automatically discounted on quotes, sales orders, sales invoices, receipts, credit memos (Apply to Sales tab), memorized quotes, and memorized invoices.

Note:Quantity discounts are calculated separately for each line of a transaction. If you create a quantity discount where purchasing 40 widgets discounts the widgets by 5%, all 40 widgets must be entered on the same line in order for the discount to be calculated.

When you sell items in multi-pack units, Peachtree checks to see whether the number of units in the multi-pack meets the criteria for a quantity discount. For example, if you create a quantity discount where selling six items gives customers a discount, selling one six-pack of the item (a multi-pack unit that you created) would be treated the same as six individual units. The customer will receive the quantity discount.

If you would like to learn more about Quantity Discounts in Sage 50 and Sage 50cloud, Accounting Business Solutions by JCS offers a Sage 50 Manufacturing/Sage 50cloud Manufacturing training class. For Sage 50 support and training, call us today at 800-475-1047 or email us at solutions@jcscomputer.com.

sage 50 bank reconciliation

How to Run an Audit Trail Report in Sage 50

What is an Audit Trail Report in Sage 50?


The Audit Trail Report is a useful report which helps users locate and correct Sage 50 errors by offering them a detailed chronological listing of all changes made in their Sage 50 company file. Sage 50 audit trail support, training and consulting for Sage 50. Give us a call for promotional offers!

Sage 50 accounts audit trail report – The audit trail feature logs when a person enters data, maintains (edits) existing data, and removes data. This useful report shows the date and time of the modifications, as well as the user who made them. The Sage 50 Audit Trail offers unique customizable columns and can assist you in pinpointing Sage 50 data errors.

Month End Close Checklist for Sage 50


How do you run an Audit Trail Report in Sage 50?

To run an Audit Trail Report, follow these simple steps after you have logged into Sage Accounting with appropriate security rights:

  1. Select Reports & Forms

How do I run an audit report in Sage 50, How do I get to the audit report in Sage 50, Does Sage 50 have an audit trail, How do you get to the audit trail in Sage, audit trail report sage, audit trail report sample,


2. Select Company, then select Reports

audit trail, Sage 50 audit trail, How do I run an audit report in Sage 50, How do I get to the audit report in Sage 50, Does Sage 50 have an audit trail, How do you get to the audit trail in Sage, audit trail report sage, audit trail report sample,


3. Select Audit Trail Report

4. When the report opens, it defaults to today’s activity.  Click Options (Gear icon) to select your specific date range.

Sage 50 audit trail, Sage peachtree audit trail, sage 50 peachtree audit trail, audit trail, Sage 50 audit trail, How do I run an audit report in Sage 50, How do I get to the audit report in Sage 50, Does Sage 50 have an audit trail, How do you get to the audit trail in Sage, audit trail report sage, audit trail report sample,


Users ask How do I get to the audit report in Sage 50 – If you need technical assistance give us a call

When you are ready to run the report look for the options Icon. This allows the user to set a date range and choose between sorting by date/time or by user name. In addition, you can filter the report by action (All, Add, Change, Delete), transaction reference, or user name.
If you want to sort or filter the report in a way that isn’t offered in the options you can send the report to Excel where you can sort or filter on any column.


Sage 50 Support Services:

Are you having trouble with your Sage 50 or Sage 50c software? The certified Sage consultants at Accounting Business Solutions by JCS offer Sage 50 training, support, and data repair. Our experienced Sage 50 experts can help get rid of your Sage 50 error  messages, including those which can be fixed with the Sage 50 Audit Trail Report. To get started with a Sage 50 consultant today, call us at 800-475-1047 today or email us at solutions@jcscomputer.com.


Manufacturing Inventory Accounting

Manufacturing Inventory Accounting: What Happens to an Inventory Account When Materials Are Bought, Requisitioned, Manufactured, used in jobs or Sold?

If your company is a construction, distributor or manufacturing business using software and are seeking information to help understand how it should work within the software system or if you are new to these processes and are looking for better inventory control, this will help.

This document is intended to give you a high-level view and help you understand what happens to quantities on hand when items are bought, requisitioned, manufactured and/or sold. Each part of the process has its own best practices and its’ own ‘accounting under the hood’ during these various phases of inventory control. Let’s get started. Here is a simple rundown to help you understand these concepts from beginning to end.

Purchases

Individual items are often referred to as raw material or components in a manufacturing environment; products for distribution; or materials for a Job. They are typically purchased through the use of a purchase order and received at the dock. The quantity on hand is increased by the number of items received and the cost of each item is typically tracked by some predetermined costing method. Tracking allow us to see the quantity and value of our inventory as an asset. Later, that tracking will also provide the tools to assign costs when they are used in manufacturing or are used on a job. Ultimately, that tracking allow us to assign a cost when completing a sale, thus granting the ability to view the profit that has been realized. Along the way, we can keep up to date with information about quantities bought, sold, used, expended, transferred or lost to mishap. Some business requires traceability for the movement of items throughout the entire manufacturing process or from purchase to sale. Manufacturers often refer to this as “quote to cash.” The receipt of items at our dock, should increase the value of our inventory while at the same time establishing either a liability for the purchase or an accrual, pending receipt of a future accounts payable invoice.

Purchased items may also be delivered directly to a client location. Usually when the documentation for this type of delivery is recorded, it is considered a ‘drop shipment’, and we are concerned mainly with recording the increase in our material expenses. When the delivery client location is a job address however, we may rather increase an asset amount in a work in process account.

Items may also be managed as non-stock when we are either, not concerned with tracking it’s value, don’t need to worry about quantities on hand, stock availability, profitability per item or sale or where tractability and/or more exacting profitability figures are not required. Sometimes it makes sense to use nonstock items when the cost of the item is so small that managing the process of recording the information is not cost effective.

When making the purchase where a vendor ships product to you and allows you to pay on account, the accounting that occurs is an increase (or debit) to inventory with a corresponding increase (or credit) to a liability account. If an invoice is received with the materials or goods, the liability would be recorded as an accounts payable amount, but if not, it is accrued in a pending payables, purchases clearing account or Accounts payable accrual account depending on your companies terminology to be relieved or transferred to accounts payable when the invoice document actually arrives and is recorded.

When making a purchase where cash, check, debit or credit card is used to directly buy inventory, the offset to an increase (debit) in inventory value would either decrease (credit) our cash in the bank or increase (credit) in the liability to our credit card company. If you are using a credit card to make the purchases, you may also want to reconcile the credit card accounts when the statement from the vendor arrives.

When recording the completed shipment of items that were ‘drop shipped’ to our clients, we usually increase (debit) our expense for the goods we purchased unless the materials were delivered to the site of our ongoing job, the transaction would most likely increase (debit) a work in process (WIP) account. Both of these would be offset appropriately based on the terms of cash or credit purchase provided by the supplier and as already outlined above.

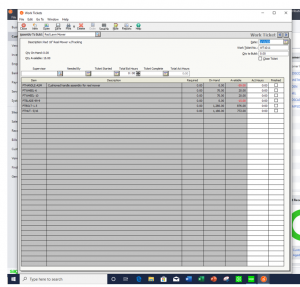
Material Requisition, Issues, Usage or Assembly:

The first step of production, when manufacturing, is the purchase of the items or materials needed. These materials may be purchased to stock for later use during the manufacturing process or directly to a job for a project. Material issue, is the movement of materials from stock into the production process, typically for a specific job, project or production run. The entire production process is recorded in the financial records of the company, and each stage of the process may have its own journal entries. This doesn’t always mean that the overall value of inventory actually changes. Learning about the journal entries that take place during the course of the production process can help you understand the effects of production on your overall financial position. A work in process (WIP) account, may be used to track the value of materials that have been specifically earmarked for a job to help segregate them from items that are available directly for sale, while still tracking costing and other information to allow for reporting on budgeting, management of resources, traceability and ultimately to allow for profitability reporting and budgets versus actual expenses and revenue.

Issuing materials, also known as putting materials into production, is the second step in the production process. Normally, company’s account for direct and indirect materials separately. Direct materials, meaning materials that can be directly traced to finished products, are recorded as an increase (debit) in work in process and a decrease (credit) in inventory account associated with that material at the time they are issued to a production run or job. When recording indirect materials, those that cannot be directly traced to finished products, we instead increase (debit) a manufacturing overhead account while decreasing our materials inventory. Because the process of issuing direct materials is a transfer between two inventory accounts, the overall inventory balance on the financial statements may not change during the lifecycle of any given production step.

Manufacturing of Finished Goods is closely related to job costing, but there are a few major differences.

Manufacturing typically utilizes the demands on inventory to assist in the timing of the inventory procurement process. To manage manufacturing production, we may need shop floor controls and the ability to track the status of items as the process of production plays out. Steps in the manufacturing process may need to be tracked to derive required item status information or when coupled with workstations, provide a framework to assist with capacity planning. Jobs tend to be broken into steps called phases and cost codes, but here the statuses we need to track are usually a % of completion. Specific instructions or CAD drawings needed for a production step may sometimes be more detailed than phase plans found in job costing. Both manufacturing and job costing may benefit from the ability to establish estimated revenue, estimated expenses and to track and manage change orders. Bar code capabilities may also provide a great assistance in a manufacturing environment by helping to manage item movement during the receiving, issuing, usage or consumption to the job and shipping steps.

When items are used during the manufacturing process, most often the material used in production are depleted by one of three methods.

Bill of Materials Assembly/Production:

This is a good choice if production management does not require work in process tracking and either the items you make have a consistent bill of materials or are repetitively manufactured items with only minor alterations to the materials needed. At the point where production is recorded, meaning the finished item is completely assembled and ready for shipment to the customer, the quantity of component items, defined by the bill of materials, are removed from inventory and finished items are increased by the quantity produced. The cost associated with the finished quantity is a factor of the cost of materials used. At the most basic level, the cost of the materials used is simply moved from the raw materials inventory account to the finished goods account. In more comprehensive systems, additional costs, like labor or overhead, may also be included in the cost associated with the finished product. These additions may be added as additional costs to increase the finished product inventory account, but would come out of an overhead or a labor used in manufacturing account, rather than a raw materials inventory account.

Work Orders or Work Tickets:

This method is most effective if you have manufacturing process where there is a significant need to manage inventory demand over time. In other words, if production takes a long time to complete and items need to be accounted for as they are used, or if your need to correlate multiple distinct production runs in order to properly manage material demand, work tickets provide an excellent tool. Work order systems often also proved tools to allow for variation on a standard bill of materials.

Work order systems may include the ability to predefine the steps needed in the manufacturing process and allow for the printing of ‘shop travelers’ or other documents to help manage the process through all of its stages. At some point, in this type of system, the cost of materials are moved from their raw materials inventory to a work in process tracking account. Once goods are completed, the costs are transferred out of the work in process account, decreasing (crediting) it’s balance. At the same time the total cost of production is used to increase (debit) the finished goods inventory. With complex bills of manufacturing involving multiple steps, the work in process account may have been increased as each step is completed and other costs like overhead or labor are recorded. Like a material issue, final assembly is often recorded as a transfer between inventory sub-accounts, and the overall inventory balance does not change. For more complex production, inventory accounts may have increased as the additional costs associated whit each completed step are recorded. The cost of goods manufactured will remain in the finished goods inventory account until the goods are sold.

Kitting

The last method is often called kitting. In this method when a finished product is invoiced, special behind the scene tools in the system, decrease the materials inventory by the quantities defined for the kit, based on their cost as tracked by the inventory system. In this instance there is a decrease (credit) in the materials inventory account with a corresponding increase (debit) in our cost of goods sold account with no intervening involvement of a finished goods inventory account.

Additional Cost of Manufacturing

Costs, other than materials, may be included as part of any of the depletion methods to increase the cost of a finished product in stock or increase the costs associated with a project or job when it is sold. These additional costs may include, labor, labor burden, subcontracted work, overhead or equipment use. Often these costs have been accounted for in other ways, so the GL accounts affected usually decrease (credit) an expense account in order to correspondingly increase (debit) the inventory account associated with the finished product. Many manufacturing systems, when the process is being tracked on Work Orders or Work Tickets, allow the definition of the operations that take place and work stations where operation steps are performed to produce a finished product. As reporting takes place on the status of these operational steps, these systems often record the the accumulation of these additional cost while allowing for oversite and management. Defining work stations and operations also provide a framework for the scheduling or available resources allowing management to identify conflicts for those resources and providing a timetable to completion. When bills of material (BOM) are combined with the management of operations and shop floor resources, it is often referred to as a bill of manufacturing. In a simple BOM assembly or kitting situation, these additional costs are often standardized and added in to the bill of materials.

Sales and Cost of Goods Sold

Deposits to jobs or manufactured items normally should be reflected as a deposit to the job, project or order. Deposits generally increase (debit) our cash in the bank while at the same time, increase (credit) our liability in a customer deposits account of some sort. The deposit should be applied to the balance due from the customer usually during the final part of the billing cycle. In a manufacturing situation, this is usually when the item is shipped while in a job cost situation where billings may be periodic or incremental, it could take place at any time up until long after the final billing when the job or project is finally considered fully complete. When the deposit is finally applied, the amount decreases (debits) customer deposits while at the same time, decreases (credits) accounts receivable, reducing the balance due from the customer.

The final step in a manufacturing environment is the sale of the items produced. The quantity being sold is shipped and recorded as such on an invoice to deplete the quantity on hand for each item being shipped. The revenue is recognized as an increase (credit) to the appropriate sales account while also increasing (debiting) accounts receivable and the balance due from the customer. Since inventory is being depleted, the inventory account is also decreased (credited) by the cost of the item and that same cost, will increase (debit) the cost of goods sold (COGS) account associated with that item. The cost associated with the sale is dictated by a costing method assigned to the product being sold.

The difference between revenues and cost of goods sold is the gross profit on the sale. If the increase (credit) to our sales account is more than the increase (debit) to our cost of goods sold account, the sale resulted in a profit.


Job Costing needs tend to differ from manufacturing in the following areas:

Both Manufacturing systems and Job Cost may require that labor, labor burden, overhead, sub-contracted services or labor, and equipment costs be rolled into the cost of what is being sold. Both often want to be able to estimate or budget their work and duplicate or review prior work for to achieve more competitive sales while insuring a profit. Each has a hierarchy of applied cost. Though highly individualized for every business entity, Manufacturing tends to rank materials as their most important cost, followed by an overhead consisting of labor, equipment, labor burden and transportation while sometimes including subcontracted services. In Job Costing time (both supplied and subcontracted labor and equipment) followed by materials is the usual hierarchy followed by labor burden and other overhead costs.

They both may also want to break their work into smaller steps for better reporting and management with the added benefit of incremental reporting providing the potential for forecast possible issues in time to make changes prior to the completion of the work. For Manufacturing, those increments are often broken down into work centers or operations, while in Job Costing we see breakdowns called phases and cost codes.

In Manufacturing systems, we generally bill customers for the product that was manufactured while Job Costing might follow one of 3 main billing methods; percent of completion, completed jobs and time and material.

The term Job Costing is most often used in the construction industry. Often the project lifecycle is longer than in Manufacturing. Labor and outside service along with actual material tend to be posted to a job during the period in which the expense occurred and comparison reporting between the actual expense and budget are review on a regular basis. Some job costing applications also use a WIP (completed job) type accounting method. Most Job Costing applications are geared towards cost tracking and often do not assist a business in the procurement process or scheduling process.

In the completed jobs accounting method, actual costs are accumulated in to WIP accounts during the life cycle of the job. Once the job is completed and the final invoice to the customer is created, the accounting entry increases (debits) accounts receivable while increasing (crediting) revenues. At the same time the expenses that have been accumulated in WIP are removed (credited) from WIP and added (debited) to the appropriate expense accounts. Both these transactions are normally recorded in the same accounting period.

In percentage of completion jobs, billing is based on the percentage of actual work has been completed for a Job. This could be based on a comparison of estimated vs actual expenses as tracked in the system or on a percent complete as reported from the jobsite. For example, if $500 of an estimated $2,500 in expense costs have been spent or if the project manager has reported and had approved completion of 20% of the work, the 20% of the total sale amount can be billed for the billing cycle. This billing method may use a WIP type accounting method, where cost are accumulated in WIP and redistributed at the time of billing as in the completed jobs method, or the costs may simply be expensed as they occur. When expensed directly, each invoicegenerated for a job, will only increase (debit) accounts receivable while increasing (credit) revenues.

In Time and Materials (T&M) Jobs,  all costs are directly expensed to the job. From the tracked time costs, like labor, subcontracted services or equipment usage, and tracked material costs, are used to bill the customer. Revenue is recognized when each customer invoice is generated and expenses are recorded at they are received.


Accounting Business Solutions by JCS specializes in inventory control software, assisting contractors, distributors and manufacturing companies in leveraging technology. Our consultants are certified in Quickbooks and Sage software, including Sage 50 and Sage 100, as well as manufacturing add-ons such as JobOps and MiSys Manufacturing. Call us today at 800-475-1047 today!

Sage Software Sage 100 Month End Checklist, Sage 50 month end checklist, Sage 100 support, Sage 50 support

Sage 50 / Sage 100 Month-End Checklist for Sage Software

Sage 50 month end Checklist or Sage 100 month end checklist

One of the main benefits of using an accounting or an ERP system is the organizational advantages offered by these products. Whether you are using Sage 100 ERP or Sage 50 software, it is crucial to keep your monthly finances accurate and up-to-date. Never fall behind with our handy Sage 50 / Sage 100 Month-End Checklist!

Sage 50 / Sage 100 Month-End starter Checklist: Get the full version of  month end checklist here

  • Enter your sales and purchase invoices for the month.
  • Enter all monthly payments and receipts from check stubs and paying-in slips.
  • Enter direct debits, ACH transfers, checks, and so on from your monthly bank statements.
  • Reconcile bank accounts for the month, including credit cards.
  • Enter journals or run wizards for accruals, prepayments, depreciation and so on.
  • Depending on where you live and your payment schedule, calculate, file, and pay your monthly state and federal employment and sales taxes.
  • Run Aged Debtors and Aged Creditors reports for the period.
  • Run Profit and Loss and Balance Sheet for the period.
  • Run month-end wizard (Tools→Period-End→Month-End).


Sage 100 Month End Checklist, Sage 100, Sage 50, Sage 50 Month End Checklist, Sage 100 support, Sage 50 support, sage software

Sage Software certified consultant

If you need help learning how to use these helpful Sage 50 / Sage 100 month-end features, call the certified Sage consultants at Accounting Business Solutions by JCS today! Our experienced, professional staff offers a full range of Sage software consulting services, including Sage 100 support, Sage 100 classes, Sage 100 data repair, Sage 50 support, Sage 50 classes, and Sage 50 data repair for all years and versions of your particular Sage product. Our nine locations, which include Detroit, MI, Chicago, IL, Charleston, SC, St. Louis, MO, Mandeville, LA, Dallas, TX, Naples, FL, Atlanta, GA, and Sacramento, CA, are conveniently located throughout the United States to serve you better. We also offer remote assistance and in-house help. Get help with your Sage 100 or Sage 50 software by calling 800-475-1047 today, by emailing us at solutions@jcscomputer.com, or by filling out our contact form. Your success is our goal! get your month end checklist here

sage 50 bank reconciliation

How do I perform a bank reconciliation in Sage 50?

A bank reconciliation is used to ensure that the transactions you have entered into your Sage 50 software match up with the transactions on your bank statement. Prior to performing a bank reconciliation in Sage 50make sure that all of your sales invoices, checks, supplier invoices, recurring charges, and receipts have been posted for the time period you are trying to reconcile. Checking this prior to actually performing the bank reconciliation in Sage 50 will save you the headache of trying to find any variance you may encounter when the reconciliation is completed.

  1. From the Sage 50 Bank Accounts module, select which account you want to reconcile by clicking on the “Reconcile” icon. You will then see the Statement Summary window, where you will need to enter the following:
    • A title for the bank reconciliation
    • The bank statement balance you are reconciling to
    • The date of the statement
  2. After clicking “OK”, the bank reconciliation screen will open and you’ll be able to use your bank statements to tick off all the transactions that are currently showing in Sage 50 against the bank statements themselves. If any items have not been selected, such as direct debits or  receipts, add them by using the adjustment button and selecting the appropriate type of payment or receipt.
  3. When you are able to match all of the items in Sage 50 with an entry on your bank statement, double check that the “Difference” box in the bottom right hand corner is zero. If the variance is anything other than zero, the first thing you should check is that you have entered the correct bank statement amount.  If those numbers are correct, you’ll have to compare the bank statement to the items you have checked off on the Sage 50 reconciliation screen.
    • Common errors include double entry of a particular transaction, accidentally selecting a transaction which is out of that particular date range, or even a transposed amount somewhere within your Sage 50 transactions.
    • One way you can quickly find errors is to compare the bank statement to the Sage 50 reconciliation screen from the most recent transaction to the oldest transaction (so backwards).
  4. If you are confident that your figures are correct and the “Difference” box in the bottom right hand side of your screen is zero, press “Reconcile.”
    • Sage 50 automatically saves a copy of your bank reconciliation in the archives if you need to revisit it at a later date.


For more Sage 50 training or to learn more about performing a bank reconciliation in Sage 50 accounting software, visit Accounting Business Solutions by JCS or call us today at 800-475-1047!

MIsys Manufacturing, MISys ERP, New York City, Los Angeles, Chicago, Houston, Philadelphia, Phoenix, San Antonio, San Diego, Dallas, San Jose, Austin, Jacksonville, Indianapolis, San Francisco, Columbus, Fort Worth, Charlotte, Detroit, El Paso, Memphis, Boston, Seattle, Denver, Washington, Nashville, Baltimore, Louisville, Portland, Oklahoma, Milwaukee, Las Vegas, Albuquerque, Tucson, Fresno, Sacramento, Long Beach, Kansas, Mesa, Virginia Beach, Atlanta, Colorado Springs, Raleigh, Omaha, Miami, Oakland, Minneapolis, Cleveland, Wichita, Arlington, New Orleans, Bakersfield, Tampa, Honolulu, Anaheim, Aurora, Santa Ana, St Louis, Riverside, Corpus Christi, Pittsburg, Lexington, Anchorage, Stockton, Cincinnati, St Paul, Toledo, Newark, Greensboro, Plano, Henderson, Lincoln, Buffalo, Fort Wayne, Jersey, Chula, Vista, Orlando, St Petersburg, Norfolk, Chandler, Laredo, Madison, Durham, Lubbock, Winston Salem, Garland, Glendale, Hialeah, Reno, Baton Rouge, Irvine, Chesapeake, Irving, Scottsdale, North Las Vegas, Fremont, Gilbert Town, San Bernardino, Boise, Birmingham

MISys ERP

MISys ERP

MIsys Manufacturing, MISys ERP, New York City, Los Angeles, Chicago, Houston, Philadelphia, Phoenix, San Antonio, San Diego, Dallas, San Jose, Austin, Jacksonville, Indianapolis, San Francisco, Columbus, Fort Worth, Charlotte, Detroit, El Paso, Memphis, Boston, Seattle, Denver, Washington, Nashville, Baltimore, Louisville, Portland, Oklahoma, Milwaukee, Las Vegas, Albuquerque, Tucson, Fresno, Sacramento, Long Beach, Kansas, Mesa, Virginia Beach, Atlanta, Colorado Springs, Raleigh, Omaha, Miami, Oakland, Minneapolis, Cleveland, Wichita, Arlington, New Orleans, Bakersfield, Tampa, Honolulu, Anaheim, Aurora, Santa Ana, St Louis, Riverside, Corpus Christi, Pittsburg, Lexington, Anchorage, Stockton, Cincinnati, St Paul, Toledo, Newark, Greensboro, Plano, Henderson, Lincoln, Buffalo, Fort Wayne, Jersey, Chula, Vista, Orlando, St Petersburg, Norfolk, Chandler, Laredo, Madison, Durham, Lubbock, Winston Salem, Garland, Glendale, Hialeah, Reno, Baton Rouge, Irvine, Chesapeake, Irving, Scottsdale, North Las Vegas, Fremont, Gilbert Town, San Bernardino, Boise, Birmingham

MISys ERP Manufacturing software integrates seamlessly with QuickBooks, Sage 50 and Sage Intacct. MISys Manufacturing software is simple to install, quick to implement and easy to use.

  • Reduce inventory costs
  • Eliminate purchasing errors
  • Improve production efficiency
  • Integrate manufacturing and accounting
  • Analyze production costs more accurately

You can choose MISys Manufacturing as a cloud-based or on-premise manufacturing solution designed for small and midsized manufacturing companies. It caters to electronics, food and beverage, aerospace, defense, chemicals, health and beauty, medical devices, pharmaceuticals and transportation, etc.

MISys ERP Features includeSage 50Cloud Support, Sage 50 Quantum

  • Purchasing
  • Inventory Tracking
  • Inventory Stock Status
  • Lot Tracking
  • Bill of Materials
  • Material Requirement Planning
  • Production Management
  • Work order Managementsage intacct, intacct, intacct misys, misys intacct, misys manufacturing intacct, intacct misys manufacturing
  • Manufacturing
  • Shop Floor Control
  • Barcode Scanner
  • Mobile Alerts
  • Cycle Counting
  • Stock Transfersquickbooks enterprise, quickbooks misys, misys quickbooks, misys manufacturing quickbooks, quickbooks misys manufacturing

Using MISys Manufacturing users can view transaction history for prior activity, enjoy integration to general ledger in core accounting systems and finally MISys Manufacturing allows users to order only what is required.

Learn More About MISYS Manufacturing from Accounting Business Solutions by JCS www.jcscomputer.com 800-475-1047

Learn to use Sage Timeslips

New Features for MISys ERP

Purchase Orders now support auto-populating Custom Fields from Item Custom Fields

Similar to how BOMs and MOs currently behave, PO details now have the ability to populate Custom Fields from Items. This requires that both the Item and PO Custom Fields are configured similarly.

Added ability to close multiple Orders (POs, WOs & MOs)

This is a long requested feature, and it’s been implemented for each of our order types. While it cannot have the granularity of a single order close, you can now multi-select from the order grid and then close each selected row at once. The help will fully describe this addition, just search for “close multiple” or something similar!

Option to Hide Closed Orders (POs, WOs & MOs)

Added a new “Hide Closed” button to the navigation toolbar for the main grids for POs, WOs & MOs. This allows for an immediate hide/display of all closed orders.

Production/Supply Schedule settings are now persisted

Zoom, date and other selections for both areas are now persisted through login sessions.

Replace/Add/Remove BOM Component function

enhanced to allow the resulting Revision to be marked as current Similar to being able to select “Force New Revision”, you can now select “Make New Revision Current” which will automatically make the created Revision the Current Revision (saving you a lot of time!)

Dashboard Alerts enhanced to consider data from related tables

Dashboard Alerts can now consider related tables when applying criteria for filtering.

Dashboard Alerts/Advanced Find enhanced to allow math statements using multiple fields

This is a long requested feature. You can now perform math from multiple fields. Say you want to create a Dashboard Alert that would display any Item Location details where the Stock Quantity + the On Order quantity is greater than the Minimum Stocking threshold. Now you can!

Dashboard Alerts/Advanced Find now has Does Not Contain/Does Not Exist Clauses

Added the ability to use these clauses in both Dashboard Alerts and Advanced Find.

Added option to Ignore Inactive Items from the Physical Inventory Worksheet

Inactive Items can now be filtered from the Physical Inventory Worksheet (and as such for any feed into the Physical Inventory batch).

Added option to Ignore Inactive Items, Closed Orders & Posted Batches to the Data Integrity Check

Added options to individually skip Inactive Items, Closed Orders and/or Posted Batches from consideration in the Data Integrity check. Larger databases should see significant improvements while running the check.

Keyboard Bindings are now persisted

Over the last few updates/versions we’ve been adding more settings/selections be persisted between sessions. This update adds keyboard shortcuts to the settings that are persisted.

X