Sage 100 Payment Processing

Sage 100 Payment Processing is an important component of the Sage 100 Accounts Payable module which allows you to write and print vendor checks. Learn how to use Sage 100 Payment Processing today!


What to Pay

  • Account Payable Aged Invoice Report
    • The Accounts Payable Aged Invoice Report provides a detailed list of paid and outstanding invoices. When printing the report, you have a choice of including just paid invoices, outstanding invoices, or both. You also have a choice of including one or all of the aging categories defined in Accounts Payable Options. You can age invoices by the invoice date or the due date.
  • Cash Requirements Report
    • The Cash Requirements Report provides a summary of outstanding invoices and total cash requirements for any three consecutive periods. This report provides the necessary data to analyze future cash needs and effectively plan cash flow on a weekly, monthly, or quarterly basis, depending on the period-ending dates entered.

Selecting Invoice for Payment

There are two tasks available on the Check Printing menu allowing you to select invoices: Invoice Payment Selection and Check Maintenance.

Invoice Payment Selection

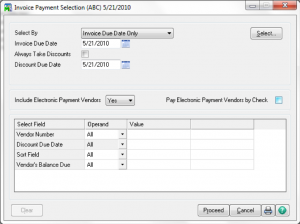
  • If the Always Take Discounts check box is selected, discounts are taken even if expired.
  • At the Vendor’s Balance Due field, you can select invoices to pay based on the vendor’s balance. For example, you can select invoices for vendors with balances due greater than or equal to a dollar amount you define.
  • Click Proceed to select invoices based on the criteria defined. You can modify or delete the selected invoices in Check Maintenance. Invoices are notselected for vendors on hold.
  • You can make additional selections by changing the criteria and running this task again.
  • Click Clear to undo the invoice selection. This button is enabled as a security event.
  • Print the Invoice Payment Selection Register to list all invoices selected for Payment.


Check and Electronic Payment Maintenance

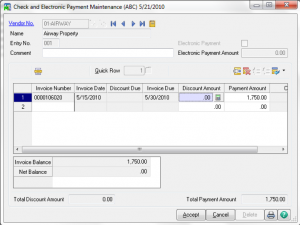
  • To add, modify or delete selections made in Invoice Payment Selection
  • To manually make selections
  • Credits can be selected to reduce the payment amount


Printing Checks

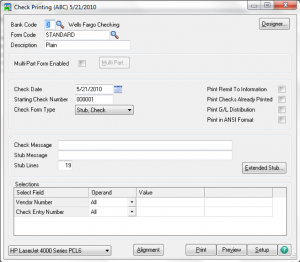
  • Checks printed one bank at a time
  • Extended Stub report
  • Check Register
  • Checks can be reprinted if they have not yet been updated


Manual Check Entry

  • Can be printed using Quick Print
  • Enter prepayments
  • Reverse checks or void unused checks
  • Apply credit memos to invoices

– Enter APP followed by a user-defined number & set amount to zero

  • Record a purchase or payment by credit card
  • Combine invoices for credit card vendors into one invoice

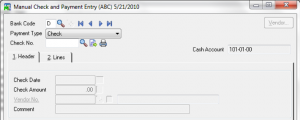
Manual Check Entry – Header

  • Next Check # button vs Quick Print button

– enter NOF for vendors not on file


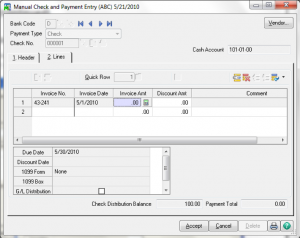
Manual Check Entry – Lines

  • Distribute to invoices, DM’s or CM’s
  • Enter unique invoice code to record a prepayment (eg. PP43004)
  • Distribute to GL acct


Manual Check Entry – Credit Card Vendors

  • When recording the payment to the credit card vendor, you can use the purchase and invoice transfer options discussed in Invoice Data Entry.

– For example, you can enter a payment to the credit card vendor for purchases already entered for a purchase vendor.

  • To record a purchase or invoice transfer, you must enter a new invoice number on the Lines tab. Selecting an existing invoice does not allow you to record a purchase or invoice transfer.
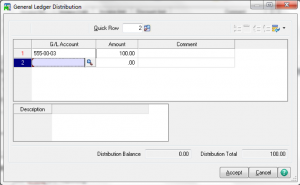
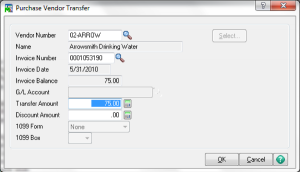
– The Transfer button is added to the G/L Distribution window. The options available for transferring are the same as seen when recording purchase and invoice transfers inInvoice Data Entry.

  • You can also combine invoices for the monthly credit card statement for your credit card vendor into one invoice.
  • When printing the Manual Check Register, invoice and purchase transfers have TRANSFER FROM or TRANSFER TO in the CHECK NO./INVOICE NO. columns. The vendor and the word TRANSFER appear in the CHECK/INV DATE columns and G/L ACCOUNT columns respectively.

Manual Check Entry – Reversals

  • When reversing a check, enter all amounts as negative numbers.
  • If the G/L Distribution check box is selected on the Lines tab, you can reverse the check and the expense without reopening the invoice.
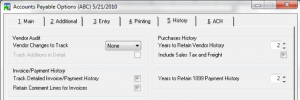
  • If the Track Detailed Invoice/Payment History check box is selected in Accounts Payable Options, you have the option of automatically adding the invoices originally paid on the Lines tab.
  • Click Yes when asked if this is a check reversal to continue with the check reversal process or click No to return to the Manual Check Entry window.
  • Click Yes when asked, to have the invoice(s) originally paid automatically added to the Lines tab.
  • Click No to manually select the invoices on the Lines tab.
  • Only the invoices still on file are automatically recalled on the Lines tab.
  • A dialog box displays the invoices you can recall.


Manual Check Entry – Voiding Used Checks

  • Just enter zero in the amount field and you will be asked if this is a void.

Manual Check Entry – Applying Negative Invoices

  • To use the Apply option, enter APP followed by a user-defined number at the Check No. field.
  • The check amount is automatically set to zero and you cannot change the amount.
  • When updating the manual checks, the Check History Report, 1099 Form, and Bank Reconciliation will not include the zero-amount check.


Are you interested in learning Sage 100 Payment Processing? Accounting Business Solutions by JCS offers Sage 100 training classes, including how to use Sage 100 Payment Processing.  Call us today at 800-475-1047 or email us at solutions@jcscomputer.com today to get started.
Sage 100 Accounts Payable Transaction Processing

Sage 100 Accounts Payable Transaction Processing is a useful tool included in your Sage 100 software which can help you track your A/P expenses. Learn how to utilize Sage 100 Accounts Payable Transaction Processing with Sage 100 training classes from Accounting Business Solutions by JCS today!


Entering Invoices

  • Batch Window

A/P Invoice Data Entry – Header

  • Click Vendor or the Vendor No. link to access Vendor Maintenance to make changes or inquiries during Invoice Data Entry and to add a new vendor.
  • Select the Hold Payment check box to place the invoice on hold.
  • Sales tax is calculated if the Calculate Sales Tax in A/P Data Entry check box is selected in Accounts Payable Options.
  • For invoices with the Use Tax check box selected, the balance owed to the vendor is only for the invoice amount.
  • The use tax amount posts at the time the invoice posts. The amount of the use tax is credited to the use tax account and debited to the accounts payable sales tax account.

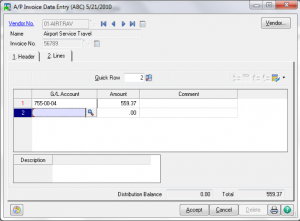
A/P Invoice Data Entry – Header

  • If the vendor is assigned a default general ledger account in Vendor Maintenance, the full amount of the invoice is automatically distributed to this account.
  • The accounts entered on this tab generally indicate the debit side of the journal entry; however, you can credit an account by entering a negative amount.
  • The distribution balance must equal .00 before completing the update process.
  • Transactions entered do not post until you print and update the Invoice Register.


Credit Card Invoices

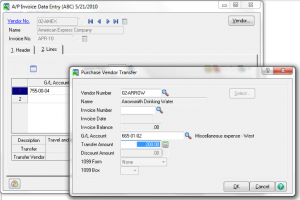
When entering an invoice for a credit card vendor, you have the option of recording a purchase or invoice transfer. You can also combine invoices into one invoice for the same credit card vendor.

  • Purchase transfers – Use to transfer the purchase amount from the credit card vendor to the purchase vendor (vendor from whom you purchased) to track 1099 and payment history.

– Payment history is recorded for both the purchase vendor and the credit card vendor.

– Purchase transfers are only used if the amount entered was not previously recorded in the system.


  • Invoice transfers – Use to transfer a balance from the original purchase vendor’s Invoice to the credit card vendor’s invoice. This is used in cases where you entered an invoice for a vendor and subsequently paid the invoice using a credit card.


  • Combining invoices – Use to combine invoices for the monthly credit card statement for your credit card vendor into one invoice.

– Combine invoices if you performed a large number of invoice and purchase transfers throughout the period but want to print one invoice (the entire statement amount) on the check stub.

  • Header Tab
  • Lines

Entering Debit & Credit Memos

  • Defined by appending –DM or –CM to reference number
  • Enter Credit Memos using negative amounts
  • Can be applied to invoices using manual check entry.

Updating Invoices and Posting the Daily Transaction Register

Adjustments

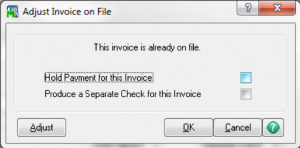
  • To change information on an already posted invoice
  • Adjust amount
  • Delete
  • Change Hold or Separate Check status or Separate Check

  • To reduce the amount of the invoice, enter the amount as a negativenumber. To increase the amount, enter the amount as a positive number.
  • To delete an invoice, enter the balance of the invoice as a negative amount. This adjusts the balance to zero. Zero balance invoices are removed using Period End Processing.


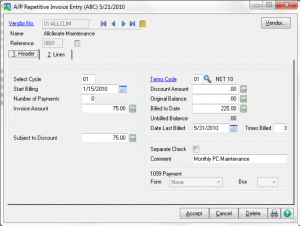
Repetitive Invoices – Header

  • The Select Cycle field is user defined and used as part of the selection process.
  • Enter the total number of payments to make at the Number of Payments field.
  • Click Print to print a list of the repetitive invoices created. Use the report as a reference for selecting invoices for processing.
  • At the Comment field, enter a comment to print on the check stub and check register.


Repetitive Invoices – Lines

  • Lines – same as invoice entry


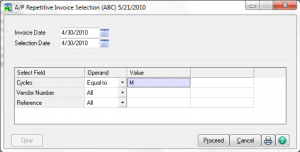
Repetitive Invoices – Invoice Selection

  • The selection date entered is compared to the number of billings and the start billing date for each repetitive invoice to determine which are selected.
  • After repetitive invoices are selected, you can view and modify them in Invoice Data Entry.
  • Combining the reference and the invoice date entered in this window automatically generates the invoice number.
  • After updating a repetitive invoice, the billed to date, unbilled balance, date last billed, and times billed is updated in Repetitive Invoice Entry.
  • If you previously selected repetitive invoices by mistake or with the incorrect selection criteria, click Clear to clear the selections.

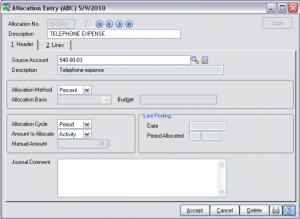
Use Allocation Entry In G/L to Redistribute Expenses

  • Headers

– Source

– Method (pct, qty, basis)

– Cycle

– Amount (activity, balance, manual)

  • Lines

– Masking


Are you interested in learning Sage 100 Accounts Payable Transaction Processing? Accounting Business Solutions by JCS offers Sage 100 training classes, including how to process Accounts Payable transactions in Sage 100.  Call us today at 800-475-1047 or email us at solutions@jcscomputer.com today to get started.
Sage 100 Vendor Maintenance


Vendor Maintenance – Main

  • Address line 3 is available and only printed on forms if data is entered and you are not using the preprinted form setting.
  • If the Hold Payment check box is selected, outstanding invoices for this vendor are not automatically selected during Invoice Payment Selection.
  • Selecting the Exemption No. on File check box indicates you have provided tax exemption numbers to your vendor.
  • The sales tax schedule selected at the Tax Schedule field is used for tax calculations and is available only if the Sales Tax Reporting and Calculate Sales Tax in A/P Entry check boxes are selected in Accounts Payable Options.
  • You can change sales tax information when entering transactions.
  • The Tax Class field represents the default tax class to use when entering transactions.
  • If the Credit Card Vendor Checkbox is selected, you can perform credit card transfers to and from credit card vendors in Invoice Data Entry and Manual Check Entry.


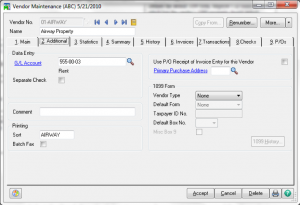
Vendor Maintenance – Additional


  • Select the Use P/O Receipt of Invoice Entry for this Vendor check box to enter invoice information for the vendor in Purchase Order Receipt of Invoice Entry. Clear this check box to enter the invoices in Accounts Payable.
  • The system tracks payments made to the vendor and produces a 1099 form for Miscellaneous Payments, Interest Payments, and Dividend Payments printed at year end.
  • The 1099 form information is available only if the 1099 Reporting check box is selected in Accounts Payable Options.

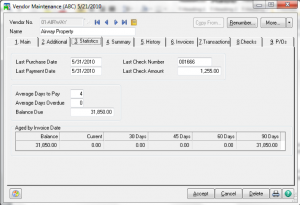
Vendor Maintenance – Statistics

  • The Aged by Invoice Date information is based on the system date and is different from the aging information on the Invoices tab.
  • Information updates as you process transactions.
  • Theability to access and change data on this tab is controlled by a security event.


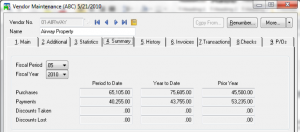
Vendor Maintenance – Summary


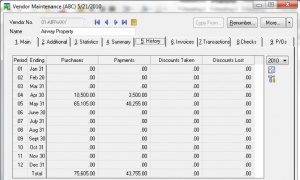
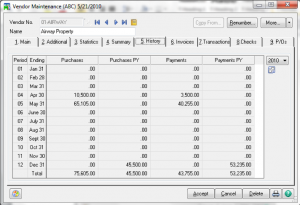
Vendor Maintenance – History


  • You can switch between history views
  • With correct security settings, you can ‘Fix’ this information.


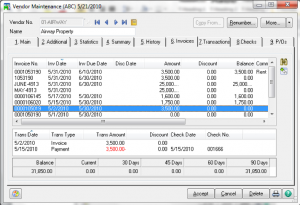
Vendor Maintenance – Invoices

  • You can turn off the display of zero balance invoices
  • You can search for specific information.
  • You can drill down on detail that has not been purged.


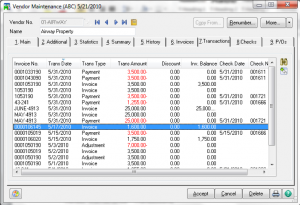
Vendor Maintenance – Transactions


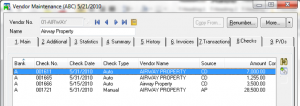
Vendor Maintenance – Checks

  • The Payment History button is available only if the Track Detailed Invoice/ Payment History check box is selected in Accounts Payable Options.


Vendor Maintenance – P/Os


Vendor Maintenance – Other

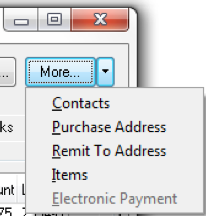
  • Copy From
  • Renumber – Cannot use for vendors with purchase history records or up-printed / un-cleared checks
  • Items Button – to view receipt and return history for a specific item and to define aliases and pricing structure information specific to this vendor.
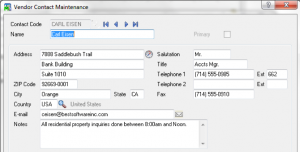
  • Contacts Button
  • Purchase Address Button – to set up and maintain one or more purchase addresses for a Vendor. Requires Integration with P/O
  • Remit To Address Button

– To print on check requires form modification

– Currently not usable with ACH

  • Electronic Payment Button


Are you interested in learning Sage 100 Vendor Maintenance? Accounting Business Solutions by JCS offers Sage 100 training classes, including how to use Sage 100 Vendor Maintenance.  Call us today at 800-475-1047 or email us at solutions@jcscomputer.com today to get started.
Sage 100 Accounts Payable Data Conversion

Sage 100 Accounts Payable Data Conversion

From another System

Gather the appropriate information and follow these steps:

  1. Gather all unpaid invoices as of your last closed accounting period.
  2. Run a report from your current system or prepare an adding machine tape totaling the invoices. This amount should equal the account balance for the accounts payable account(s) in General Ledger.
  3. Set the accounting date to the last day of the last closed accounting period. This is the current period established in Accounts Payable Options.
  4. Enter 1099 payments in the current calendar year.
  5. In Invoice Data Entry, enter the outstanding balance amounts for each invoice using the original invoice dates. During the distribution process, post the entire distribution balance to your accounts payable account number in General Ledger.

Note: Do this when you have expensed these invoices in the previous system.

  1. Print the Invoice Register from the Main menu. The total should equal the balance of the accounts payable account in General Ledger.
  2. Update the Invoice Register and the Daily Transaction Register.
  3. Run Full Period End Processing to clear the month-to-date purchases fields and forward to the next period.
  4. Reset the accounting date to the first day of the current accounting period.

Linking Accounts Payable to Accounts Receivable

  • Vendor / Customer Link Maintenance
  • AP form AR Clearing Selection
  • AP form AR Clearing Entry
  • AP form AR Clearing Register

Are you interested in learning about Converting Accounts Payable to Sage 100 from Another System? Accounting Business Solutions by JCS offers Sage 100 training classes, including Converting Accounts Payable to Sage 100 from Another System.  Call us today at 800-475-1047 or email us at solutions@jcscomputer.com today to get started.


Sage 100 Accounts Payable and Receivable Maintenance

Learn how to maintain Sage 100 Accounts Payable and Sage 100 Accounts Receivable with Sage 100 training classes from Accounting Business Solutions by JCS!

One of the most attractive features of Sage 100 is its flexibility, and the Sage 100 Accounts Payable module and Sage 100 Accounts Receivable modules are no exception. Sage 100 Accounts Payable Maintenance and Accounts Receivable Maintenance contains a variety of options which can be customize to fit your particular needs.


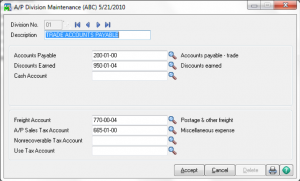
Division Maintenance

  • GL Accounts are assigned
  • Leave Cash Account blank to assign by bank code
  • Use 00 (default) for no divisions
  • You must enter an Accounts Payable and Discounts Earned account to avoid missing or invalid general ledger account errors when updating.


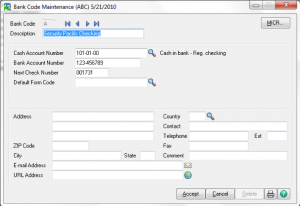
Bank Code Maintenance

  • A is default bank code
  • Bank Code Beginning Balances are entered through Bank Reconciliation
  • After a bank code is defined and the integration to Bank Reconciliation is selected, transactions using a bank code are updated to Bank Reconciliation.


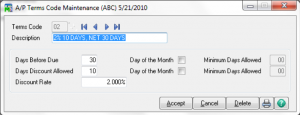
Terms Code Maintenance

  • 00 is default terms code


Sales Tax

For calculation of sales tax in AP or PO

  • Sales Tax Class Maintenance
  • Sales Tax Code Maintenance
  • Sales Tax Schedule Maintenance
  • Sales Tax Account Maintenance

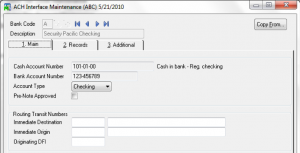
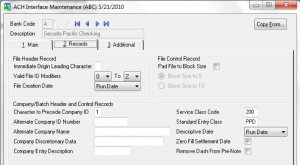
ACH Interface Maintenance


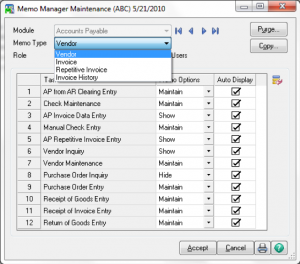
Memo Manager Maintenance


  • Assign security roles to where memos can be created / viewed


Are you interested in learning how to maintain Sage 100 Accounts Payable or Sage 100 Accounts Receivable? Accounting Business Solutions by JCS offers Sage 100 training classes, including how to customize options in Accounts Payable in Sage 100.  Call us today at 800-475-1047 or email us at solutions@jcscomputer.com today to get started.
Sage 100 Accounts Payable Options

Learn how to use Sage 100 Accounts Payable Options with Sage 100 training classes from Accounting Business Solutions by JCS!

One of the most attractive features of Sage 100 is its flexibility, and the Sage 100 Accounts Payable module is no exception. AP in Sage 100 has a variety of customizable options which range from sales tax reporting and aging options to printing and batch processing options. Continue reading to see the various customizable screens in Sage 100 Accounts Payable.


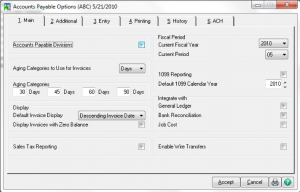
Accounts Payable Options – Main

  • Divisions
  • Aging
  • Sales Tax Reporting
  • Integration


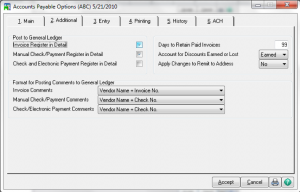
Accounts Payable Options – Additional

  • Posting
  • Comments
  • Invoices paid on or before the number of days entered are purged automatically during period-end processing.
  • Other


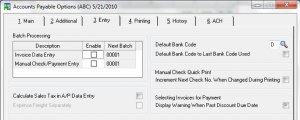
Accounts Payable Options – Entry

  • Batch Processing
  • Defaults
  • Resets


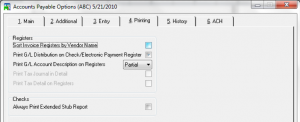
Accounts Payable Options – Printing


Accounts Payable Options – History


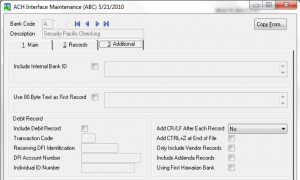
Accounts Payable Options – ACH


Are you interested in learning how to customize Sage 100 Accounts Payable? Accounting Business Solutions by JCS offers Sage 100 training classes, including how to customize options in Accounts Payable in Sage 100.  Call us today at 800-475-1047 or email us at solutions@jcscomputer.com today to get started.

How to Set Up Sage 100 Accounts Payable

Correctly setting up Sage 100 Accounts Payable is crucial to your Sage 100 success. Learn how to set up Sage 100 Accounts Payable here!


What’s needed for AP setup

Before using Accounts Payable for a new company, you must complete the Accounts Payable system startup process. Before beginning the system startup process, gather the following information:

  • Your general ledger chart of accounts
  • A list of states, counties, and local areas to which you report sales tax and their tax rates
  • Your bank account number(s) for the checking account(s) used by Accounts Payable
  • A list of standard payment terms offered by your vendors
  • A list of vendors, including addresses and phone numbers
  • All unpaid invoices at the time of installation


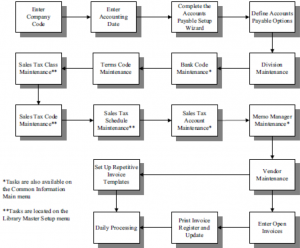
Steps for setting up Sage 100 Accounts Payable

  1. Enter the Company Code
  2. Enter Accounting Date
  3. Complete the Accounts Payable Setup Wizard
  4. Define Accounts Payable Options
  5. Division Maintenance
  6. (Bank Code Maintenance)
  7. Terms Code Maintenance
  8. (Sales Tax Class Maintenance)
  9. (Sales Tax Code Maintenance)
  10. (Sales Tax Schedule Maintenance)
  11. (Sales Tax Account Maintenance)
  12. (Memo Manager Maintenance)
  13. Vendor Maintenance
  14. Beginning Balance Entry
  15. Open Invoice Entry
  16. Print Invoice Register and Update
  17. (Set-up Repetitive Invoice Templates)
  18. Daily Processing

Are you interested in learning how to set up Sage 100 Accounts Payable? Accounting Business Solutions by JCS offers Sage 100 training classes, including how to set up Accounts Payable in Sage 100.  Call us today at 800-475-1047 or email us at solutions@jcscomputer.com today to get started.
Sage Software Sage 100 Month End Checklist, Sage 50 month end checklist, Sage 100 support, Sage 50 support

Sage 50 / Sage 100 Month-End Checklist for Sage Software

Sage 50 month end Checklist or Sage 100 month end checklist

One of the main benefits of using an accounting or an ERP system is the organizational advantages offered by these products. Whether you are using Sage 100 ERP or Sage 50 software, it is crucial to keep your monthly finances accurate and up-to-date. Never fall behind with our handy Sage 50 / Sage 100 Month-End Checklist!

Sage 50 / Sage 100 Month-End starter Checklist: Get the full version of  month end checklist here

  • Enter your sales and purchase invoices for the month.
  • Enter all monthly payments and receipts from check stubs and paying-in slips.
  • Enter direct debits, ACH transfers, checks, and so on from your monthly bank statements.
  • Reconcile bank accounts for the month, including credit cards.
  • Enter journals or run wizards for accruals, prepayments, depreciation and so on.
  • Depending on where you live and your payment schedule, calculate, file, and pay your monthly state and federal employment and sales taxes.
  • Run Aged Debtors and Aged Creditors reports for the period.
  • Run Profit and Loss and Balance Sheet for the period.
  • Run month-end wizard (Tools→Period-End→Month-End).


Sage 100 Month End Checklist, Sage 100, Sage 50, Sage 50 Month End Checklist, Sage 100 support, Sage 50 support, sage software

Sage Software certified consultant

If you need help learning how to use these helpful Sage 50 / Sage 100 month-end features, call the certified Sage consultants at Accounting Business Solutions by JCS today! Our experienced, professional staff offers a full range of Sage software consulting services, including Sage 100 support, Sage 100 classes, Sage 100 data repair, Sage 50 support, Sage 50 classes, and Sage 50 data repair for all years and versions of your particular Sage product. Our nine locations, which include Detroit, MI, Chicago, IL, Charleston, SC, St. Louis, MO, Mandeville, LA, Dallas, TX, Naples, FL, Atlanta, GA, and Sacramento, CA, are conveniently located throughout the United States to serve you better. We also offer remote assistance and in-house help. Get help with your Sage 100 or Sage 50 software by calling 800-475-1047 today, by emailing us at solutions@jcscomputer.com, or by filling out our contact form. Your success is our goal! get your month end checklist here

Sage 100 software, sage 100 near me, sage 100 accounting software, sage 100 price, sage 100 database, sage 100 cloud vs sage 100, sage 100 API, sage 100 cloud, sage 100cloud, sage 100 integration, Sage 100 vs sage intacct, Is Sage 100 still available, What kind of software is Sage 100, Is Sage 100 similar to QuickBooks, What is the cost of Sage 100 software, Is Sage 100 and ERP system, What is the difference between Sage 50 and Sage 100, Is Sage 100 Easy, What type of system is sage 100, Is MAS 90 and erp system, Sage 100 Support Sage MAS 90 Sage MAS 200 Support Reseller Cost For Software Implementation - Sage 100 Accounting Consultant Sales Upgrades and Technical Support. Sage MAS 90 and Sage MAS 200 Consultant Technical Assistance Custom Advanced Reports Sage Intelligence Crystal Reports Training Classes Sage 100 reseller, Sage 100 cloud reseller, Sage 100cloud training, sage 100 training, sage 100 cloud training, sage 100cloud support, sage 100 support, sage 100 cloud support, Sage 100cloud consultant, sage 100 consultant, sage 100 cloud consultant, Sage 100 2023, sage 100 2022, sage 100 2021, Sage 100 2020, sage 100 2019, sage 100 2018, sage 100 2017, sage 100 2016, sage 100 2015, sage 100 2014, sage 100 2013, sage 100 2012, sage 100 2011 Near Me Sage MAS 90 Support Sage MAS 200 Support Sage 100 Consultant Providing Training Classes Custom Advanced Reports Crystal Reports Sage Intelligence

Sage 100 2018.3: Accounts Payable Changes

Every few months, Sage releases an update for their Sage 100 software which includes many useful changes and bug fixes to help your Sage 100 product run faster and more efficiently. The most recent version, Sage 100 2018.3, includes many helpful changes to Accounts Payable, including but not limited to:

  • The DiscountAmt field in AP_CheckHeader file now shows the total discount for all invoices included on the check.
  • Vendor Maintenance Invoice Inquiry feature under ‘More’ displays invoices generated from Purchase Order Invoice amount now matches the Net Invoice Amount displayed on the AP Invoice History drill down screen.
  • Added required 1099 boxes for calendar year 2017
  • Tax Account Number is no longer incorrectly required in eFiling and Reporting 1099 Misc Setup Wizard
  • Help for A/P Invoice History Inquiry has been enhanced.
  • Unable to enter Amount on Credit Memo in Job Cost Distribution Detail when reversing an electronic payment is now fixed.
  • AP invoice entry – Get ‘The Vendor Number is no longer required’ message when launching vendor maintenance from hyper link and the vendor number isn’t blank.
  • Accounts Payable Adjusted Invoice No Longer Paid twice.
  • In Form 1099 Tax eFiling and Reporting for 1099-MISC forms, a Tax Account Number is no longer required if there is no state income to report.


Accounting Business Solutions by JCS offers a variety of Sage 100 support, training, and data repair services to assist you with any problems you may be having with Accounts Payable in Sage 100 2018.  Our certified Sage 100 consultants have years of experience helping businesses just like yours maximize the efficiency of their Sage 100 software. To learn more about Sage 100 software, call us at 800-475-1047 or email us at solutions@jcscomputer.com. Your success is our goal!

To download the Sage 100 2018.3 update, visit the Sage 100 2018 download portal here.

What’s New in Sage 100 and Sage 100c 2018

What’s New in Sage 100 and Sage 100c 2018?

Support – Training – Consultant – Reseller

Feature enhancements for the latest updates in Sage

Sage 100 2017.2

Accounts Receivable – Payment Setup Wizard

To help set up credit card and ACH payment processing through Sage Exchange account a payment setup wizard has been added. After setting up your Sage Exchange account, the wizard will guide you through enabling ACH payment processing and credit card processing in Company Maintenance and creating payment types.

Payroll – Sage 100 Direct Deposit Service Processing

Changes were made to the Process Employee Pre-Note and Direct Deposit Transaction Window:

  1. A warning message will appear if you select a batch that has already been sent or has an effective date that has passed
  2. The Select Sent button has been renamed to Select Batches Previously Transmitted and is now at the bottom of the column of button
  3. The Select Not Sent button has been renamed to Select Batches Never Transmitted and has moved to the top of the column of buttons

Sage 100 2017

Global Enhancements

Enhanced Auto-Complete

In previous versions this feature only considered the beginning of the text in the searched fields. Now, when using the updated feature, your search criteria is compared with all words within the searched fields. For example, if you have a customer named Allen’s Appliance Repair and a customer named Appliance Services, typing Appl in the Customer No field results in a list that includes both customers. The number of fields included in the search has been expanded to include the ability to search for vendors by phone number. Try typing the phone number (digits only) in the vendor no. field.


Build Search Index Utility

In order to activate the enhanced auto-complete feature, run the Build Search Index utility on the Library Master Utilities menu. If this step isn’t run, the auto-complete will run as it did prior to the enhancement. This utility can be run after creating a new customer, vendor and item records so that the records are indexed and appear in the auto-complete results. When running the utility it updates the index for all of your companies. Use the Task Scheduler to automatically run the indexing utility on a regular basis.

Full Text Search Option in Lookup Windows

A full text option has been added to the Search list in the Lookup windows. When Full Text is selected, search criteria is compared with the data in all columns available in the lookup window. The search criteria must match the beginning of a word. For example, if you have a customer named Market Supplies and another customer named Village Market, if you type Mark in the search results, Village Market will not show up.

Search for Empty Fields in Lookup Windows

Now there is the ability to search for fields that do not contain any value in the lookup windows. Select a field from the Search list then select Is Empty from the operand list then click find.

Maintain Commodity Codes for Miscellaneous and Inventory Items

Maintain a list of commodity codes and associate them with miscellaneous items. Commodity codes are included with the data send when processing level 3 credit card transactions in the Sales Order module.

  • A Commodity Code field has been added to the Main tab in Product Line Maintenance. A Commodity Code check box has been added to the Apply Product Line Information window so that you can apply the code entered in the Product Line Maintenance to the selected Inventory items within the product line.
  • There is a new Commodity Desc field displays the commodity code description in Sales Order Entry and Sales Order Invoice Data Entry.
  • Common Information Setup menu now has Commodity Code Maintenance added. This task can be used to maintain a list of commodity codes and their descriptions. Codes and descriptions are available in the lookup views for Commodity Code fields. Click the Apply button to assign a Commodity Code range of items.
  • Selecting an item in the Sales Order Entry and Sales Order Invoice Data Entry, the code entered in the item’s maintenance task is the default value in the Commodity Code field. This can be changed.
  • The Commodity Code Import Wizard which is available on the Common Information Utilities menu will guide you through importing commodity codes from tab-delimited text files.
  • On the Main tab in Miscellaneous Item Maintenance there has been a Commodity Code fields added. You can create a new code on the fly or enter an existing code.

Larger Font for Selected Reports

Font size used for selected reports has been increased to improve visibility. Reports have previously been viewed in 6 point font but now is 30-40% taller.

Prior and Next Buttons for Calendar Window

Use the Prior and Next buttons to quickly change from month to month on the calendar window.

Cancel Button Available when Printing Reports

Cancel report printing by clicking Cancel button on the message window that appears while the report is processing.

Suppress “Remove Forms” Message

There is now an option in Role Maintenance that allows you to suppress the message that reminds you to replace forms with paper after printing.

Resizable Memo Maintenance Window

Resize the Memo Maintenance window by dragging the lower-right corner of the window.

New Options on Help Ribbon

New buttons on the Help Ribbon include:

  • Create a Support Ticket
  • Access Sage 100 Knowledgebase
  • Start a chat session with Sage 100 Tech Support

Accounts Receivable

You can now enter ACH payments in the following tasks:

  • Repetitive Invoice Entry
  • Cash Receipts Entry
  • Accounts Receivable Data Entry

This feature is enabled when you have Sage Payment Solutions account that is set up for ACH payments. Enable the feature on the Payments tab in the Company Maintenance and set up ACH payment types in Payment Type Maintenance. Some fields, tasks and tabs have been renamed to reference ‘payments’ instead of ‘credit cards’. Details in the following sections.

ACH Payment Processing

ACH payments are submitted to the Sage Payments Solutions as part of the Cash Receipts Journal and Accounts Receivable Sales Journal update process. They cannot be processed individually.

Data Entry Tasks

The following changes were made in the data entry tasks

  • ACH Payment related fields have been added to the Cash Receipts Deposit window and the Cash Receipts Entry Header tab.
  • The Credit Card tab has been renamed to the Payment tab. Fields related to ACH payments have been added. The Payment ID field has replaced the Credit Card ID field.
  • The Fix button is now available on the Payment tab based on the Allow to Override ACH Payment Transaction security event in Role Maintenance.

Reports and Listings

  • Print a customers’ ACH payment information has been added to the Customer Listing task window. The last 4 digits of the bank account appear in the listing.
  • Credit Card Settlement Report has been renamed to Credit Card and ACH Settlement report to include ACH payments on the report.
  • The last 4 digits of the bank account appear for ACH payments on the Deposit Transaction Report

Maintenance Tasks

  • Now you are able to select ACH Payment as the payment method when in the Payment Type Maintenance
  • An ACH account field now displays in Invoice History Inquiry which displays the last 4 digits of the ACH payment bank account for invoices with ACH Payments. The Payment Information button has replaced the Credit Card Information button and will open a new Payment Information window to view additional details about the payment.
  • ACH payments now appear in the secondary grid on the Customer Maintenance Invoices and Transactions tabs.
  • On the Customer Maintenance Additional tab, the Payment ID field has replaced the Card ID field
  • Customer Credit Card Maintenance window has been renamed Customer Credit Card and ACH Payment Maintenance

Changing Transaction Information

Allow to Override ACH Payment Transactions has been added for security. This security event enables the Fix button on the Payments tab in A/R Invoice Data Entry and Cash Receipts Entry which allows users to update payment transaction information.

Bank Reconciliation

Following check boxes have been added to the Bank Reconciliation Report task window:

  • Keep Window Open After Preview
  • Keep Window Open After Print

Improved Export to Excel or Financial Reports

The Excel file is easier to view and manipulate when exporting Bank Reconciliation reports. Minimum font size 8 points and empty columns and rows are minimized.

Customer Relation Management

Now included with Sage 100 is Sage CRM 7.3. To obtain information on what’s new in this version, see Sage CRM 7.3 SP3 Release Notes. This document is available in the Documentation link in the Sage CRM installation program. On the Auto run screen that appears, click the Documentation link when you start the Sage CRM installation.

Library Master

After selecting a role in Role Maintenance, you can click the Search button and enter search criteria. Matching security events, tasks and module options appear and you can select one to go to its location on the applicable tab.

Sales Order

Enter ACH payments in Sales Order Entry and S/O Invoice Data

A Sage Payment Solutions account is set up you can enable this feature.


For more information on Sage 100, Sage 100c give one of our professional consultants a call 800-475-1047 www.jcscomputer.com

With over 25 years of accounting and business knowledge as well as proficient technical background you get the training and support your business needs and deserves working with a proficient expert consultant.   You can work with the same consultant to help you master your Sage Software and for those occasional questions you need help with so you can understand best practices and how to manage your company information and books.

Put our 25 years of experience to work for you!

“Your Success is Our Goal”

www.jcscomputer.com          800-475-1047          solutions@jcscomputer.com

Like us on Facebook  and follow us on Twitter

Alabama Alaska Arizona Arkansas California Colorado Connecticut Delaware Florida Georgia Hawaii Idaho Illinois Indiana Iowa Kansas Kentucky Louisiana Maine Maryland Massachusetts Michigan Minnesota Mississippi Missouri Montana Nebraska Nevada New Hampshire New Jersey New Mexico New York North Carolina North Dakota Ohio Oklahoma Oregon Pennsylvania Rhode Island South Carolina South Dakota Tennessee Texas Utah Vermont Virginia Washington West Virginia Wisconsin Wyoming


TAGS: Sage 100, Sage 100c, Sage 100 Support, Sage 100c Support, Sage 100 Consultant, Sage 100c Consultant, Sage 100 Reseller, Sage 100c Reseller, Sage Features, Sage 100 Features, Sage 100 Enhancements, Sage 2017, Sage Training, Sage Consultant

X