Sage 100 Payment Processing
Sage 100 Payment Processing is an important component of the Sage 100 Accounts Payable module which allows you to write and print vendor checks. Learn how to use Sage 100 Payment Processing today!
What to Pay
- Account Payable Aged Invoice Report
- The Accounts Payable Aged Invoice Report provides a detailed list of paid and outstanding invoices. When printing the report, you have a choice of including just paid invoices, outstanding invoices, or both. You also have a choice of including one or all of the aging categories defined in Accounts Payable Options. You can age invoices by the invoice date or the due date.
- Cash Requirements Report
- The Cash Requirements Report provides a summary of outstanding invoices and total cash requirements for any three consecutive periods. This report provides the necessary data to analyze future cash needs and effectively plan cash flow on a weekly, monthly, or quarterly basis, depending on the period-ending dates entered.
Selecting Invoice for Payment
There are two tasks available on the Check Printing menu allowing you to select invoices: Invoice Payment Selection and Check Maintenance.

Invoice Payment Selection
- If the Always Take Discounts check box is selected, discounts are taken even if expired.
- At the Vendor’s Balance Due field, you can select invoices to pay based on the vendor’s balance. For example, you can select invoices for vendors with balances due greater than or equal to a dollar amount you define.
- Click Proceed to select invoices based on the criteria defined. You can modify or delete the selected invoices in Check Maintenance. Invoices are notselected for vendors on hold.
- You can make additional selections by changing the criteria and running this task again.
- Click Clear to undo the invoice selection. This button is enabled as a security event.
- Print the Invoice Payment Selection Register to list all invoices selected for Payment.
Check and Electronic Payment Maintenance
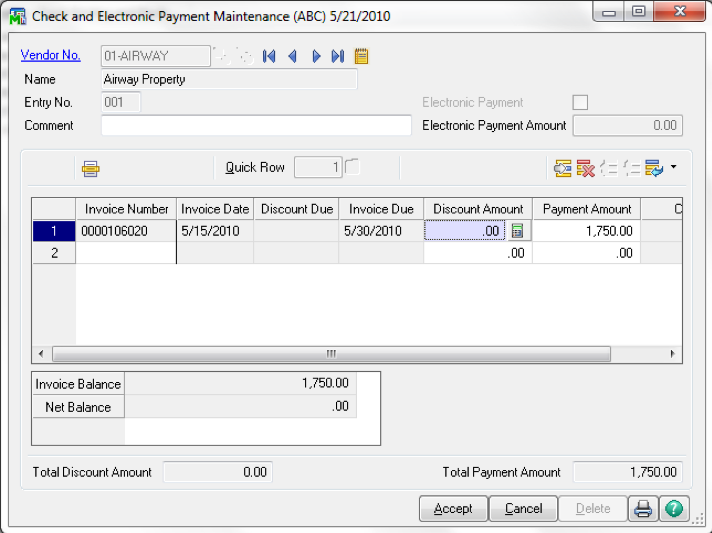
- To add, modify or delete selections made in Invoice Payment Selection
- To manually make selections
- Credits can be selected to reduce the payment amount
Printing Checks

- Checks printed one bank at a time
- Extended Stub report
- Check Register
- Checks can be reprinted if they have not yet been updated
Manual Check Entry
- Can be printed using Quick Print
- Enter prepayments
- Reverse checks or void unused checks
- Apply credit memos to invoices
– Enter APP followed by a user-defined number & set amount to zero
- Record a purchase or payment by credit card
- Combine invoices for credit card vendors into one invoice
Manual Check Entry – Header

- Next Check # button vs Quick Print button
– enter NOF for vendors not on file
Manual Check Entry – Lines
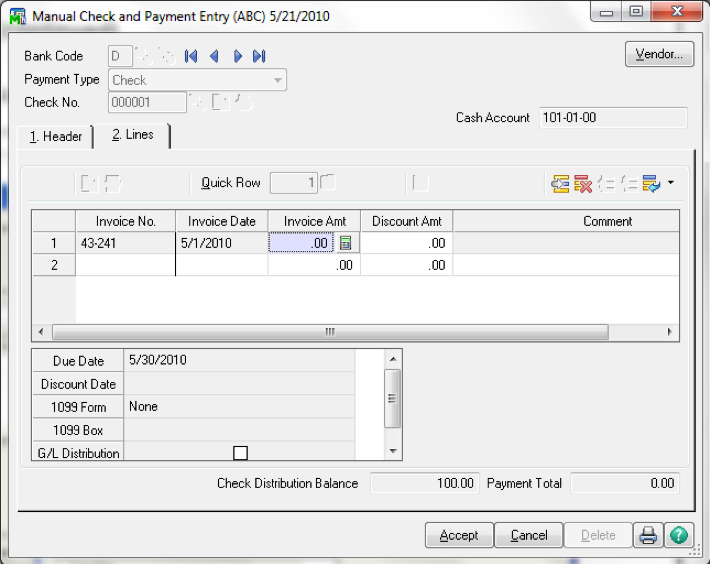
- Distribute to invoices, DM’s or CM’s
- Enter unique invoice code to record a prepayment (eg. PP43004)
- Distribute to GL acct
Manual Check Entry – Credit Card Vendors
- When recording the payment to the credit card vendor, you can use the purchase and invoice transfer options discussed in Invoice Data Entry.
– For example, you can enter a payment to the credit card vendor for purchases already entered for a purchase vendor.
- To record a purchase or invoice transfer, you must enter a new invoice number on the Lines tab. Selecting an existing invoice does not allow you to record a purchase or invoice transfer.
 – The Transfer button is added to the G/L Distribution window. The options available for transferring are the same as seen when recording purchase and invoice transfers inInvoice Data Entry.
- You can also combine invoices for the monthly credit card statement for your credit card vendor into one invoice.
- When printing the Manual Check Register, invoice and purchase transfers have TRANSFER FROM or TRANSFER TO in the CHECK NO./INVOICE NO. columns. The vendor and the word TRANSFER appear in the CHECK/INV DATE columns and G/L ACCOUNT columns respectively.
Manual Check Entry – Reversals
- When reversing a check, enter all amounts as negative numbers.
- If the G/L Distribution check box is selected on the Lines tab, you can reverse the check and the expense without reopening the invoice.
- If the Track Detailed Invoice/Payment History check box is selected in Accounts Payable Options, you have the option of automatically adding the invoices originally paid on the Lines tab.
- Click Yes when asked if this is a check reversal to continue with the check reversal process or click No to return to the Manual Check Entry window.
- Click Yes when asked, to have the invoice(s) originally paid automatically added to the Lines tab.
- Click No to manually select the invoices on the Lines tab.
- Only the invoices still on file are automatically recalled on the Lines tab.
- A dialog box displays the invoices you can recall.
Manual Check Entry – Voiding Used Checks
- Just enter zero in the amount field and you will be asked if this is a void.
Manual Check Entry – Applying Negative Invoices
- To use the Apply option, enter APP followed by a user-defined number at the Check No. field.
- The check amount is automatically set to zero and you cannot change the amount.
- When updating the manual checks, the Check History Report, 1099 Form, and Bank Reconciliation will not include the zero-amount check.
Are you interested in learning Sage 100 Payment Processing? Accounting Business Solutions by JCS offers Sage 100 training classes, including how to use Sage 100 Payment Processing. Call us today at 800-475-1047 or email us at solutions@jcscomputer.com today to get started.