How to Set Up Sage 100 Accounts Payable
Correctly setting up Sage 100 Accounts Payable is crucial to your Sage 100 success. Learn how to set up Sage 100 Accounts Payable here!
What’s needed for AP setup
Before using Accounts Payable for a new company, you must complete the Accounts Payable system startup process. Before beginning the system startup process, gather the following information:
- Your general ledger chart of accounts
- A list of states, counties, and local areas to which you report sales tax and their tax rates
- Your bank account number(s) for the checking account(s) used by Accounts Payable
- A list of standard payment terms offered by your vendors
- A list of vendors, including addresses and phone numbers
- All unpaid invoices at the time of installation
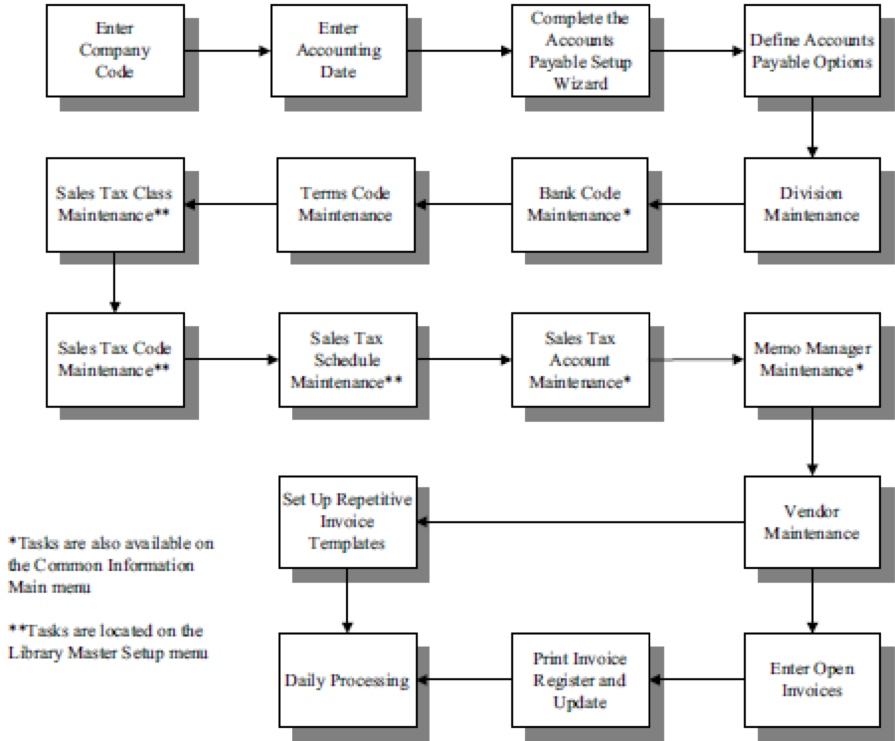
Steps for setting up Sage 100 Accounts Payable
- Enter the Company Code
- Enter Accounting Date
- Complete the Accounts Payable Setup Wizard
- Define Accounts Payable Options
- Division Maintenance
- (Bank Code Maintenance)
- Terms Code Maintenance
- (Sales Tax Class Maintenance)
- (Sales Tax Code Maintenance)
- (Sales Tax Schedule Maintenance)
- (Sales Tax Account Maintenance)
- (Memo Manager Maintenance)
- Vendor Maintenance
- Beginning Balance Entry
- Open Invoice Entry
- Print Invoice Register and Update
- (Set-up Repetitive Invoice Templates)
- Daily Processing
Are you interested in learning how to set up Sage 100 Accounts Payable? Accounting Business Solutions by JCS offers Sage 100 training classes, including how to set up Accounts Payable in Sage 100. Call us today at 800-475-1047 or email us at solutions@jcscomputer.com today to get started.